Introduction to Python
The following is a short introduction to Jupyter notebooks (formerly known as IPython notebooks) and Python. It is loosely based on more comprehensive tutorials IPython Notebook Tutorial and Python / Numpy Tutorial. For a full Python documentation see Python documentation.
Jupyter notebook
In this course, we will be using Jupyter notebooks. A Jupyter notebook lets you write and execute Python code in your web browser. Jupyter notebooks make it very easy to tinker with code and execute it in bits and pieces; for this reason Jupyter notebooks are widely used in scientific computing.
Installation
Ubuntu
On Ubuntu install the web application Jupyter Notebook by typing the following three commands in the console
$ sudo apt update$ sudo apt install python3-pip python3-dev$ sudo pip3 install jupyterWindows
On Windows follow the instructions given for example in A Beginner’s Guide to Installing Jupyter Notebook Using Anaconda Distribution. Note that the Anaconda distribution also includes installation of Python language.
Running Jupyter notebook
Once you have jupyter installed, start the notebook with the command
If everything worked correctly, your web browser should pop up and you should see a screen like this, showing all available Jupyter notebooks in the current directory
As you can see, there is a Jupyter notebook file called IPython tutorial.ipynb in our working directory. If you clicked through to the notebook file, you would see a screen like this
A Jupyter notebook is made up of a number of cells. Each cell can contain Python code. You can execute a cell by clicking on it and pressing Shift-Enter. When you do so, the code in the cell will run, and the output of the cell will be displayed beneath the cell. For example, after running the first cell the notebook looks like this
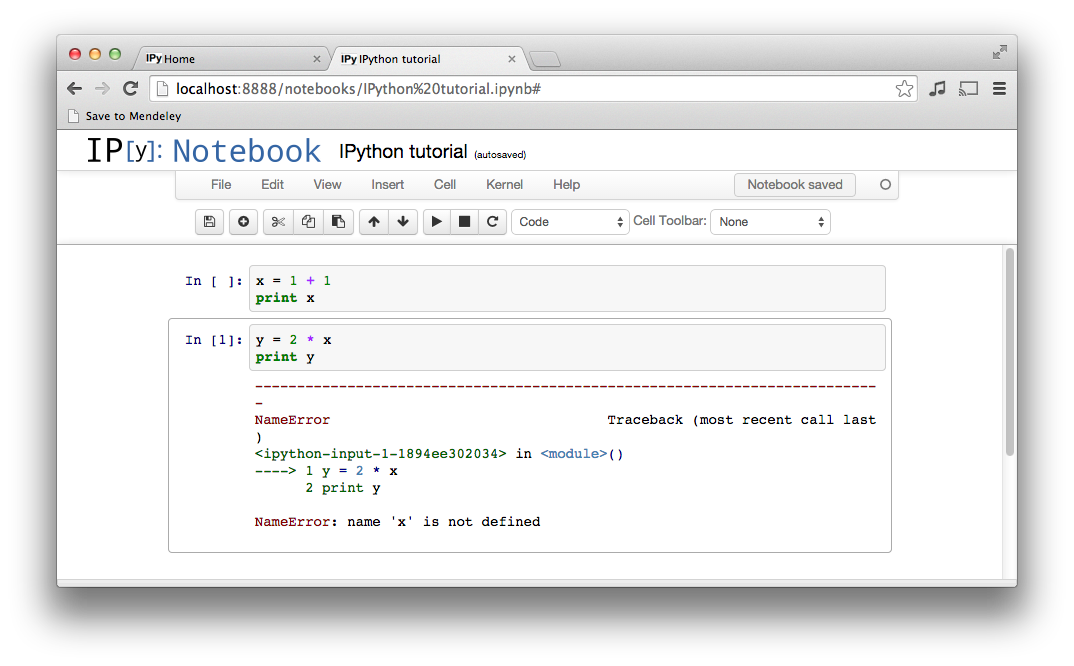
Global variables are shared between cells. Executing the second cell thus gives the following result
By convention, Jupyter notebooks are expected to be run from top to bottom. Failing to execute some cells or executing cells out of order can result in errors
This has only been a brief introduction to Jupyter notebooks, but it should be enough to get you up and running on this course.
Python
Python is a high-level, dynamically typed programming language. Python code is often said to be almost like pseudocode, since it allows you to express very powerful ideas in very few lines of code while being very readable.
There are currently two different supported versions of Python, 2.7 (run by python command) and 3.7 (run by python3 command). Somewhat confusingly, Python 3.0 introduced many backwards-incompatible changes to the language, so code written for 2.7 may not work under 3.7 and vice versa. For this course all code will use Python 3.7.
On most Unix systems (Linux distributions, macOS), both versions of Python are pre-installed so you don’t need to worry about the installation. You can check your Python 3 version at the command line by running python3 --version.
In case you are using a Windows system, install Python through Anaconda distribution as mentioned above by following the instructions given for example in A Beginner’s Guide to Installing Jupyter Notebook Using Anaconda Distribution.
Imports
Modules are Python .py files that consist of Python code and can define functions, classes, and variables that you can reference in other Python .py files. Typically for this course, we will be using the fenics module. Modules are accessed by using the import statement as follows
[83]:
import fenics
We can now access everything from the fenics module via the statement fenics."something", e.g. the function IntervalMesh is accessed in the following way
[84]:
mesh = fenics.IntervalMesh(20, 0.0, 2.0)
When the module name is ubiquitous in your code, it is a good practice to use
[85]:
import fenics as fe
to shorten your code. This way we can call IntervalMesh just by writing
[86]:
mesh = fe.IntervalMesh(20, 0.0, 2.0)
If one wants to access an object from a Python module directly, one can use the syntax
[2]:
from fenics import IntervalMesh
and then access the function IntervalMesh as follows
[3]:
mesh = IntervalMesh(20, 0.0, 2.0)
Another possibility for importing objects from a module represents the so called wildcard import written as
[4]:
from fenics import *
The above code imports everything from the module fenics. This practice is generally not recommended as the import statements should be as specific as possible and should only import what they need.
Functions
Python functions are defined using the def keyword. For example
[87]:
def sign(x):
    if x > 0:
        return 'positive'
    elif x < 0:
        return 'negative'
    else:
        return 'zero'
defines a function sign which takes one argument (a number) and returns a string which says whether the given number is positive, negative, or zero. Let’s try it out
[88]:
for x in [-1, 0, 1]:
    print(sign(x))
negative
zero
positive
Classes
Python is an object oriented programming language. Almost eveything in Python is an object which has its properties and methods. A class keyword initiates an object constructor. Let us create a class called Greeter with property name and method greet()
[89]:
class Greeter(object):

    # Constructor
    def __init__(self, name):
        self.name = name

    # Instance method
    def greet(self, loud=False):
        if loud:
            print('HELLO, {}!'.format(self.name.upper()))
        else:
            print('Hello, {}'.format(self.name))
Conventionally, the name of an object constructor starts with a capital letter (that’s why “Greeter”). We can now create an object (an instance of the class Greeter) via
[90]:
greeter_1 = Greeter('Fred')
The variable greeter_1 now holds an instance of the class Greeter initialized with a name 'Fred'. Let us verify that
[91]:
print(greeter_1.name)
Fred
We can also access the instance’s method greet()
[92]:
greeter_1.greet()
greeter_1.greet(loud=True)
Hello, Fred
HELLO, FRED!